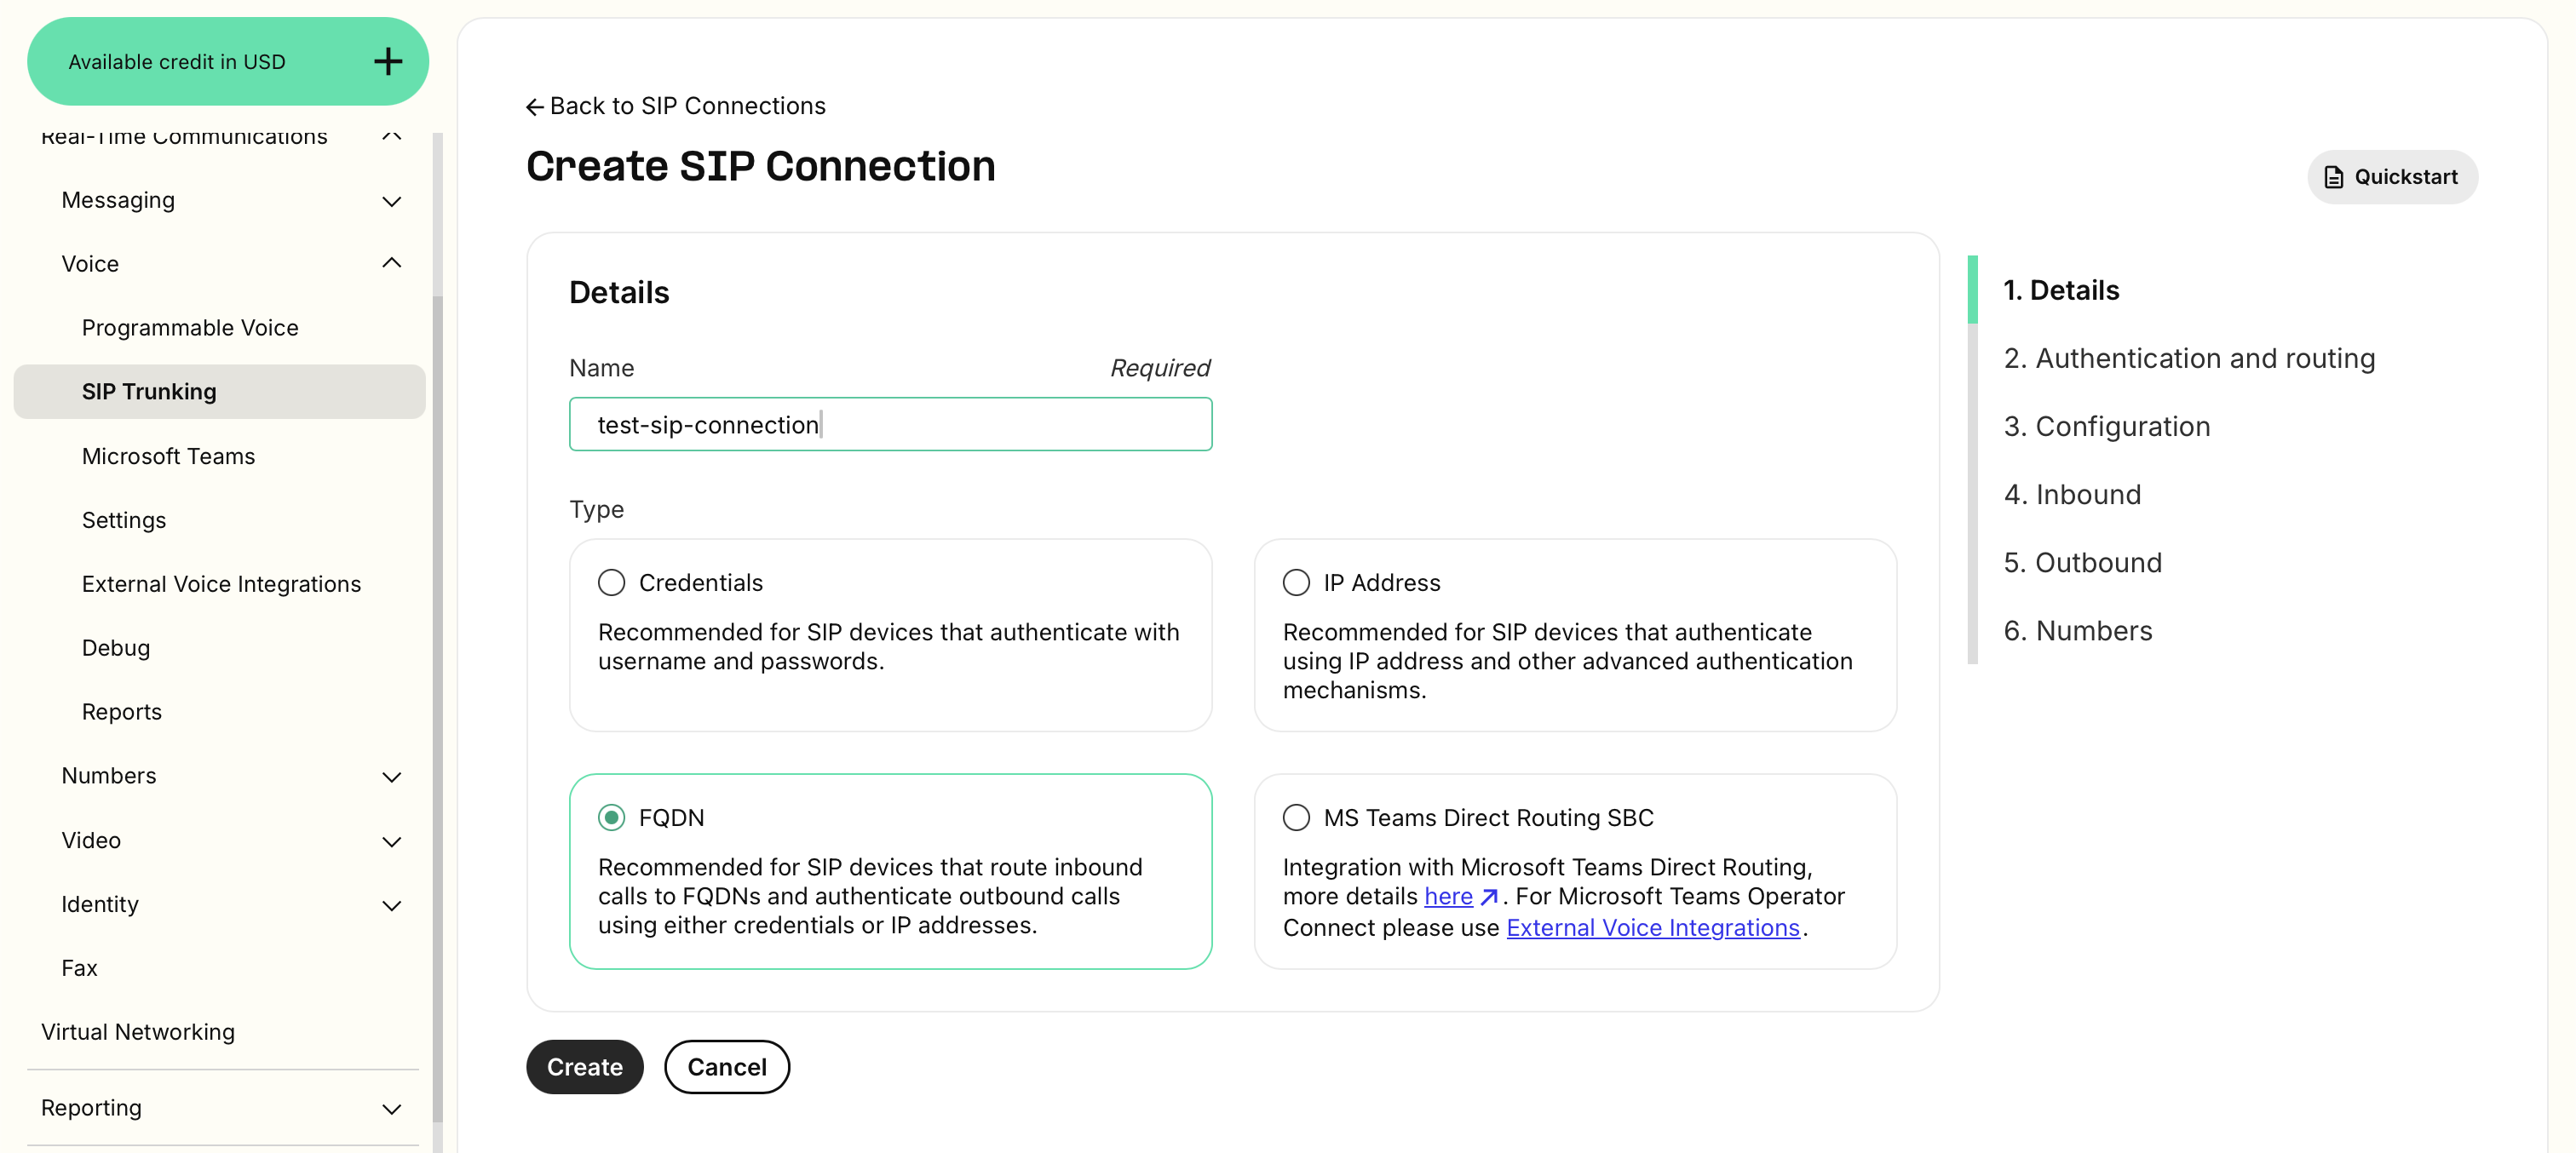
- Go to the Telnyx Console and select SIP, under the Real-Time Communications > Voice section, and click Create SIP Connection.

- Select a name for your trunk, and select “FQDN” as the type, then click “Create”.
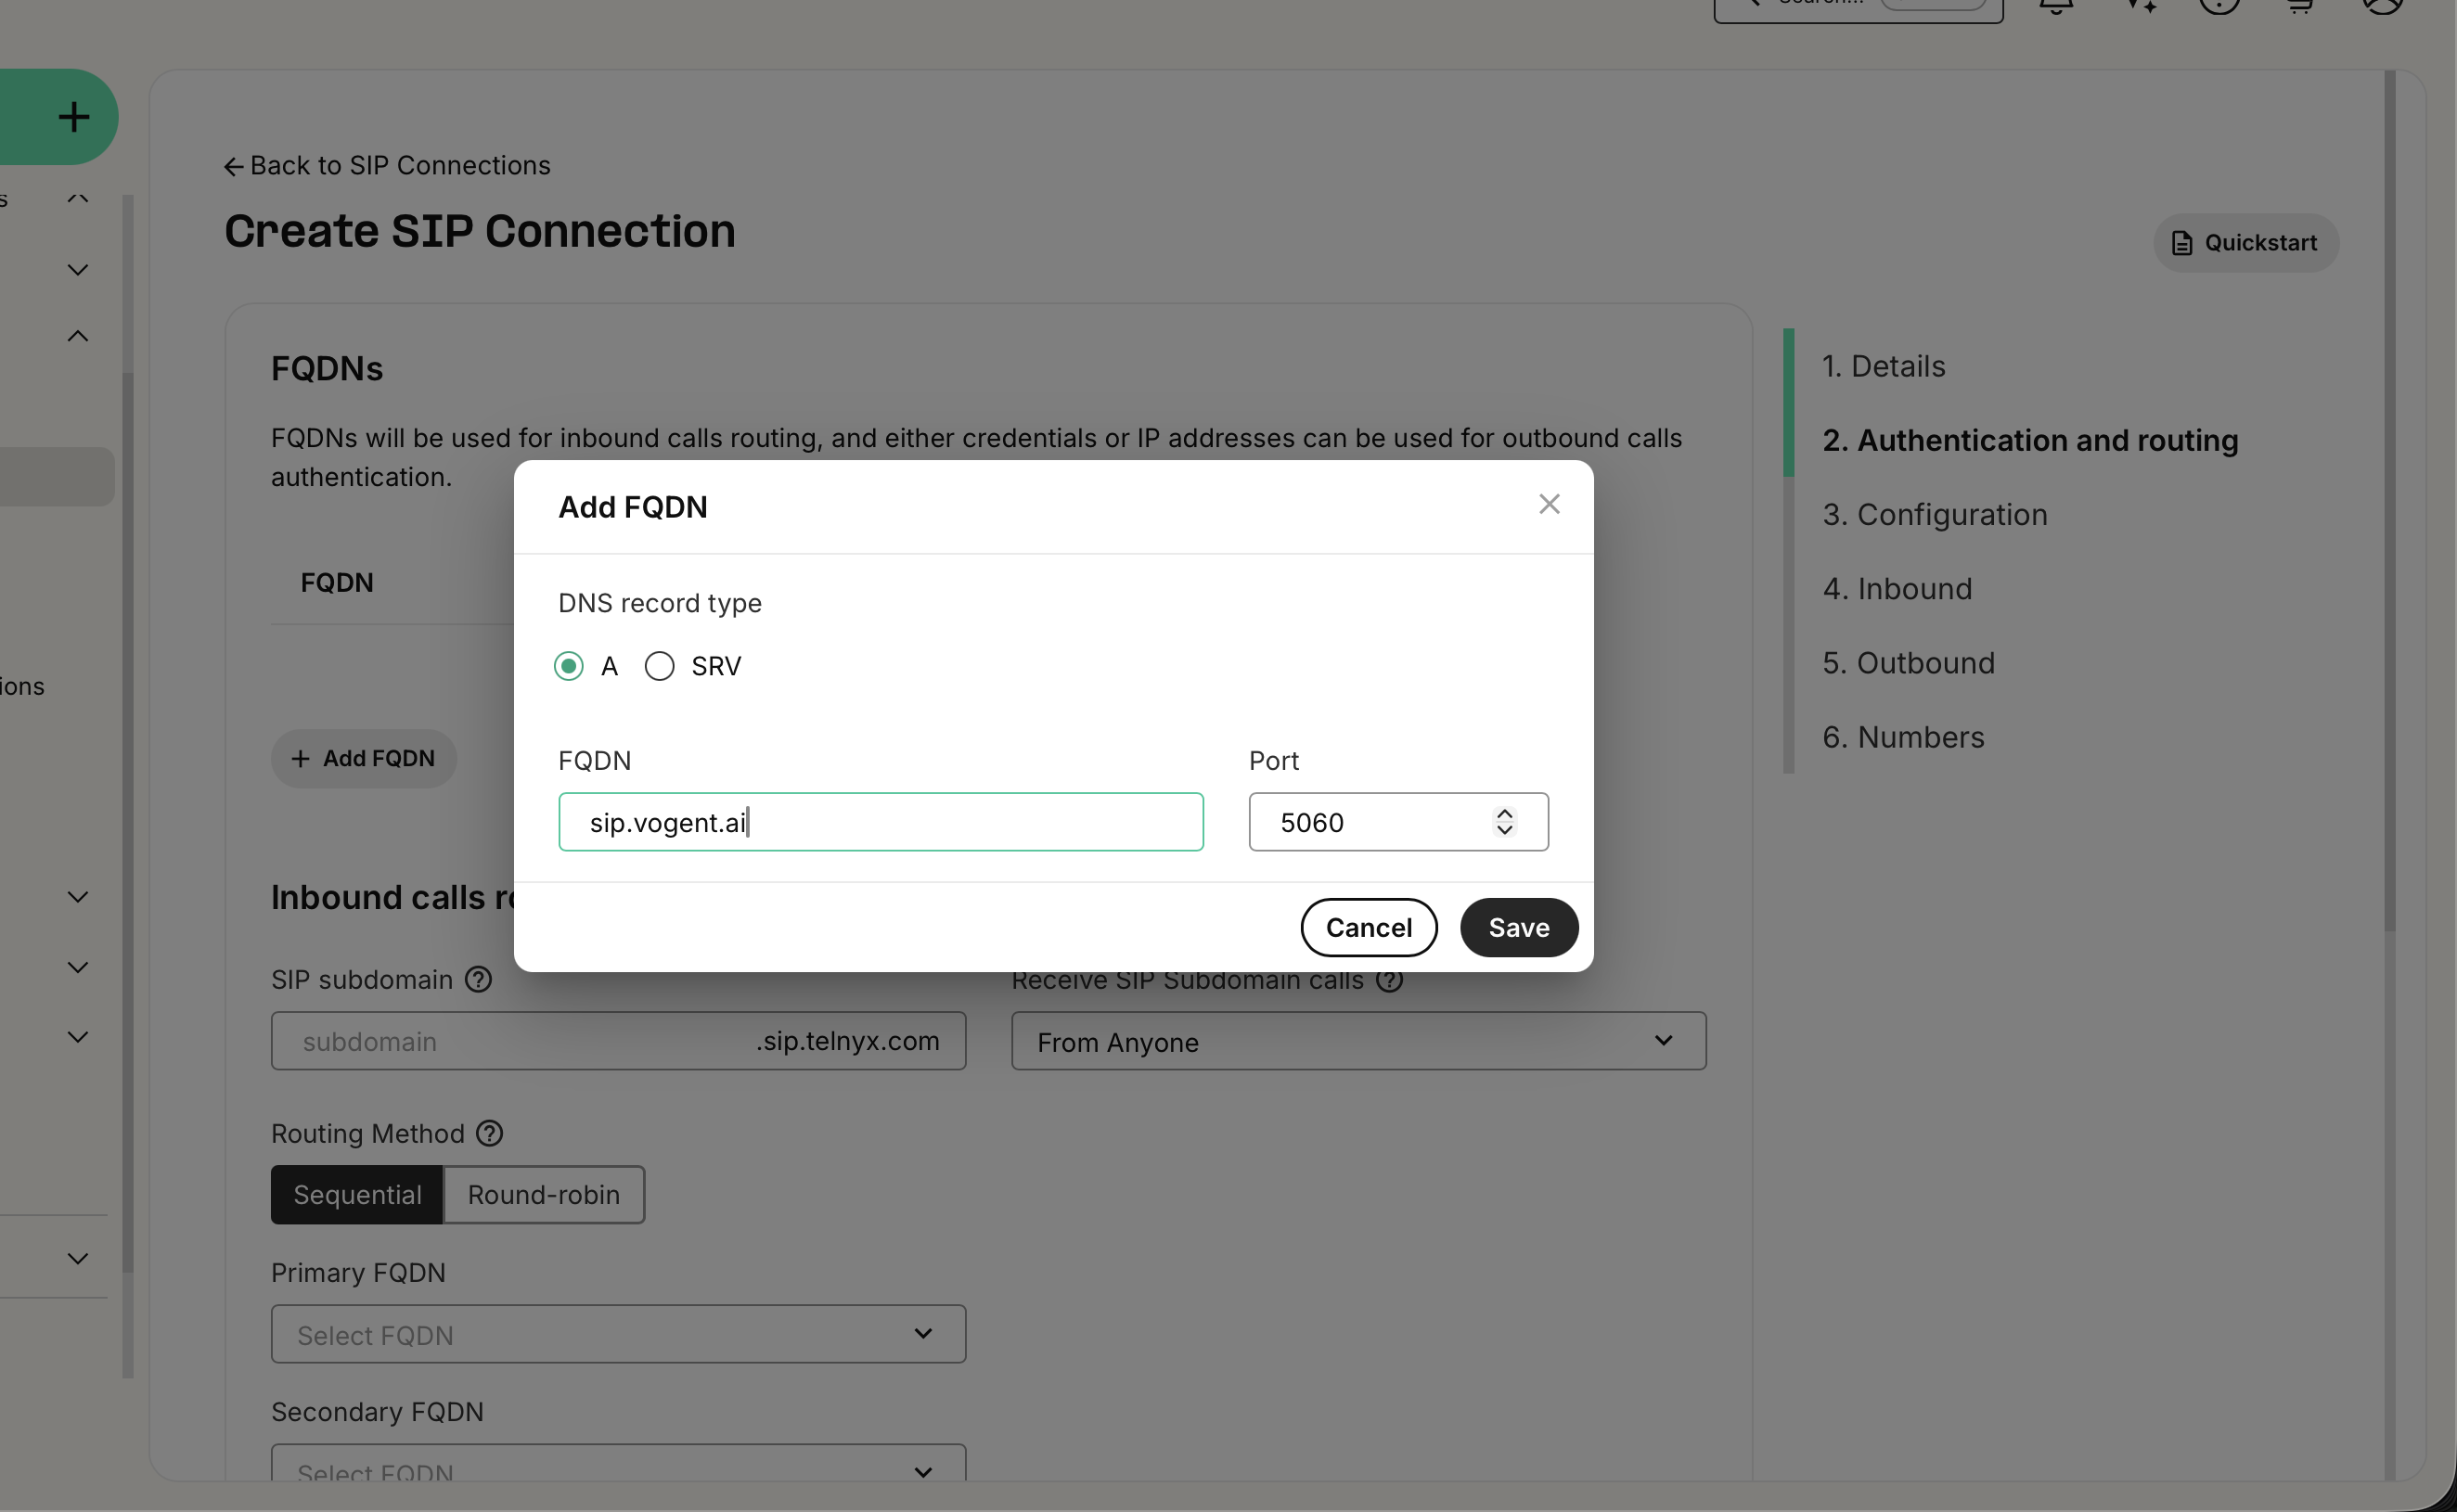
- Click “Add FQDN”, and enter “sip.vogent.ai” as the FQDN to add.
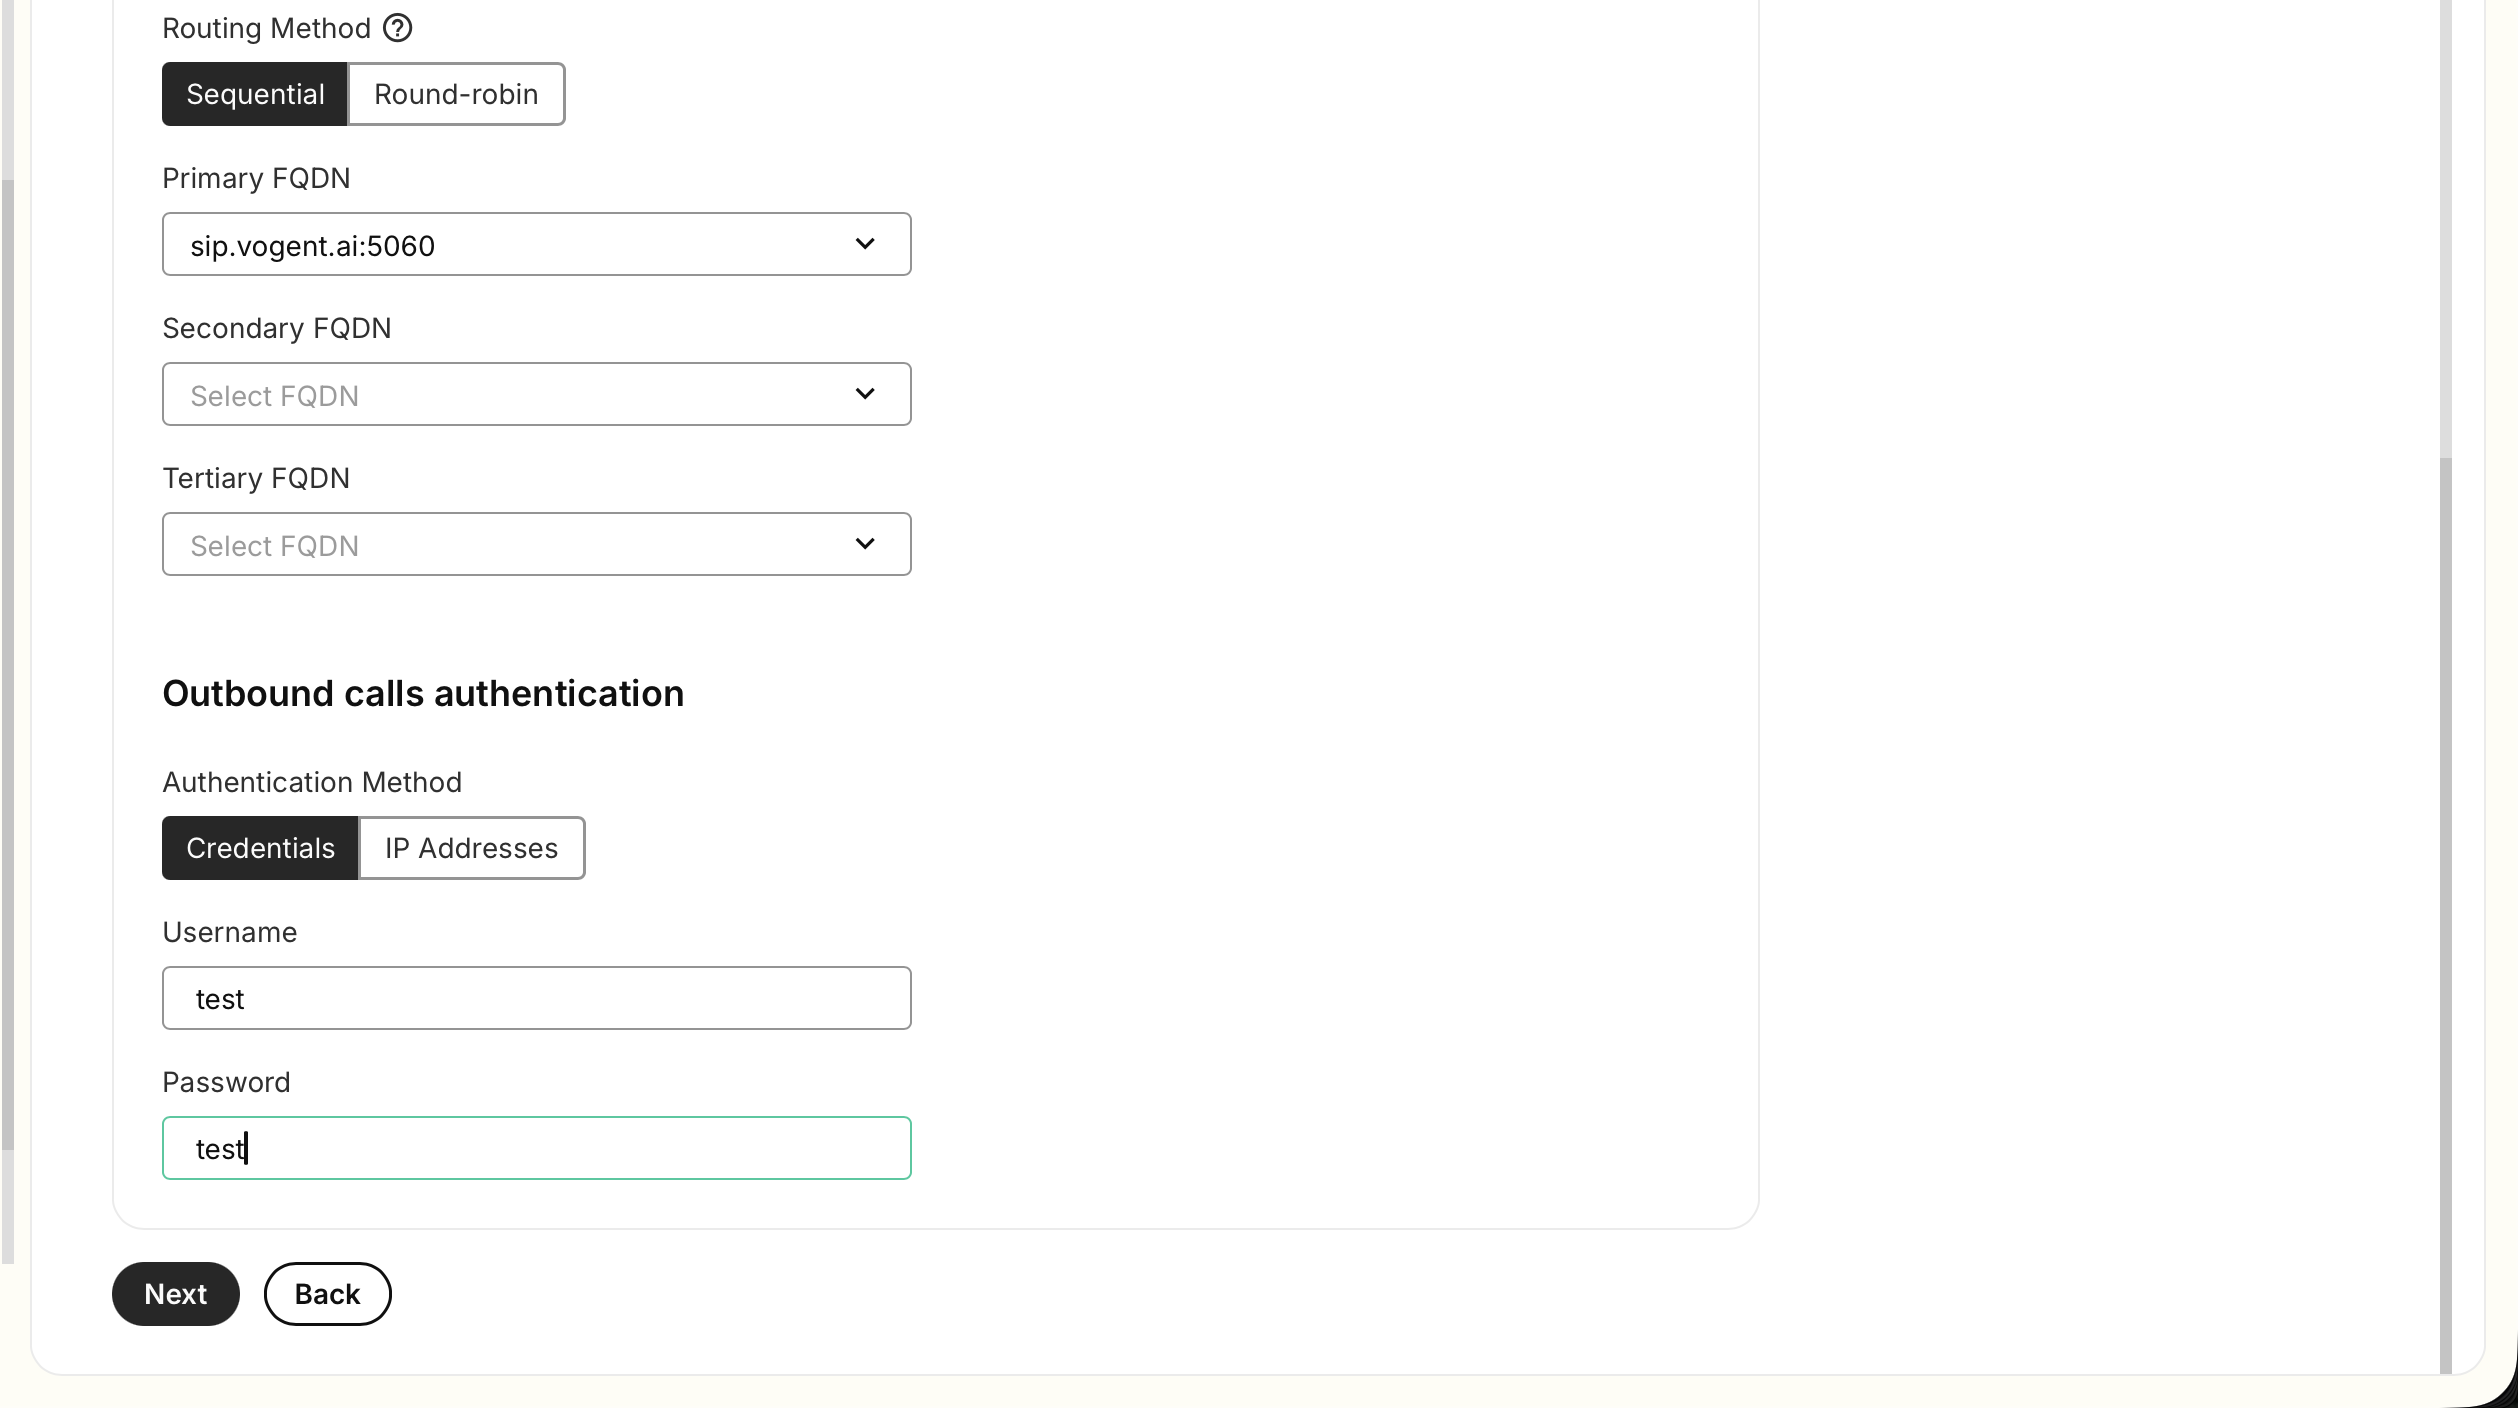
- Select the FQDN you just added (sip.vogent.ai) under “Primary FQDN”.
- Under the “Outbound calls authentication” section, select “Credentials” as the type, and create a username and password for the credentials.
- On the “Configuration” step, click Next, you may leave the defaults as-is for this step.
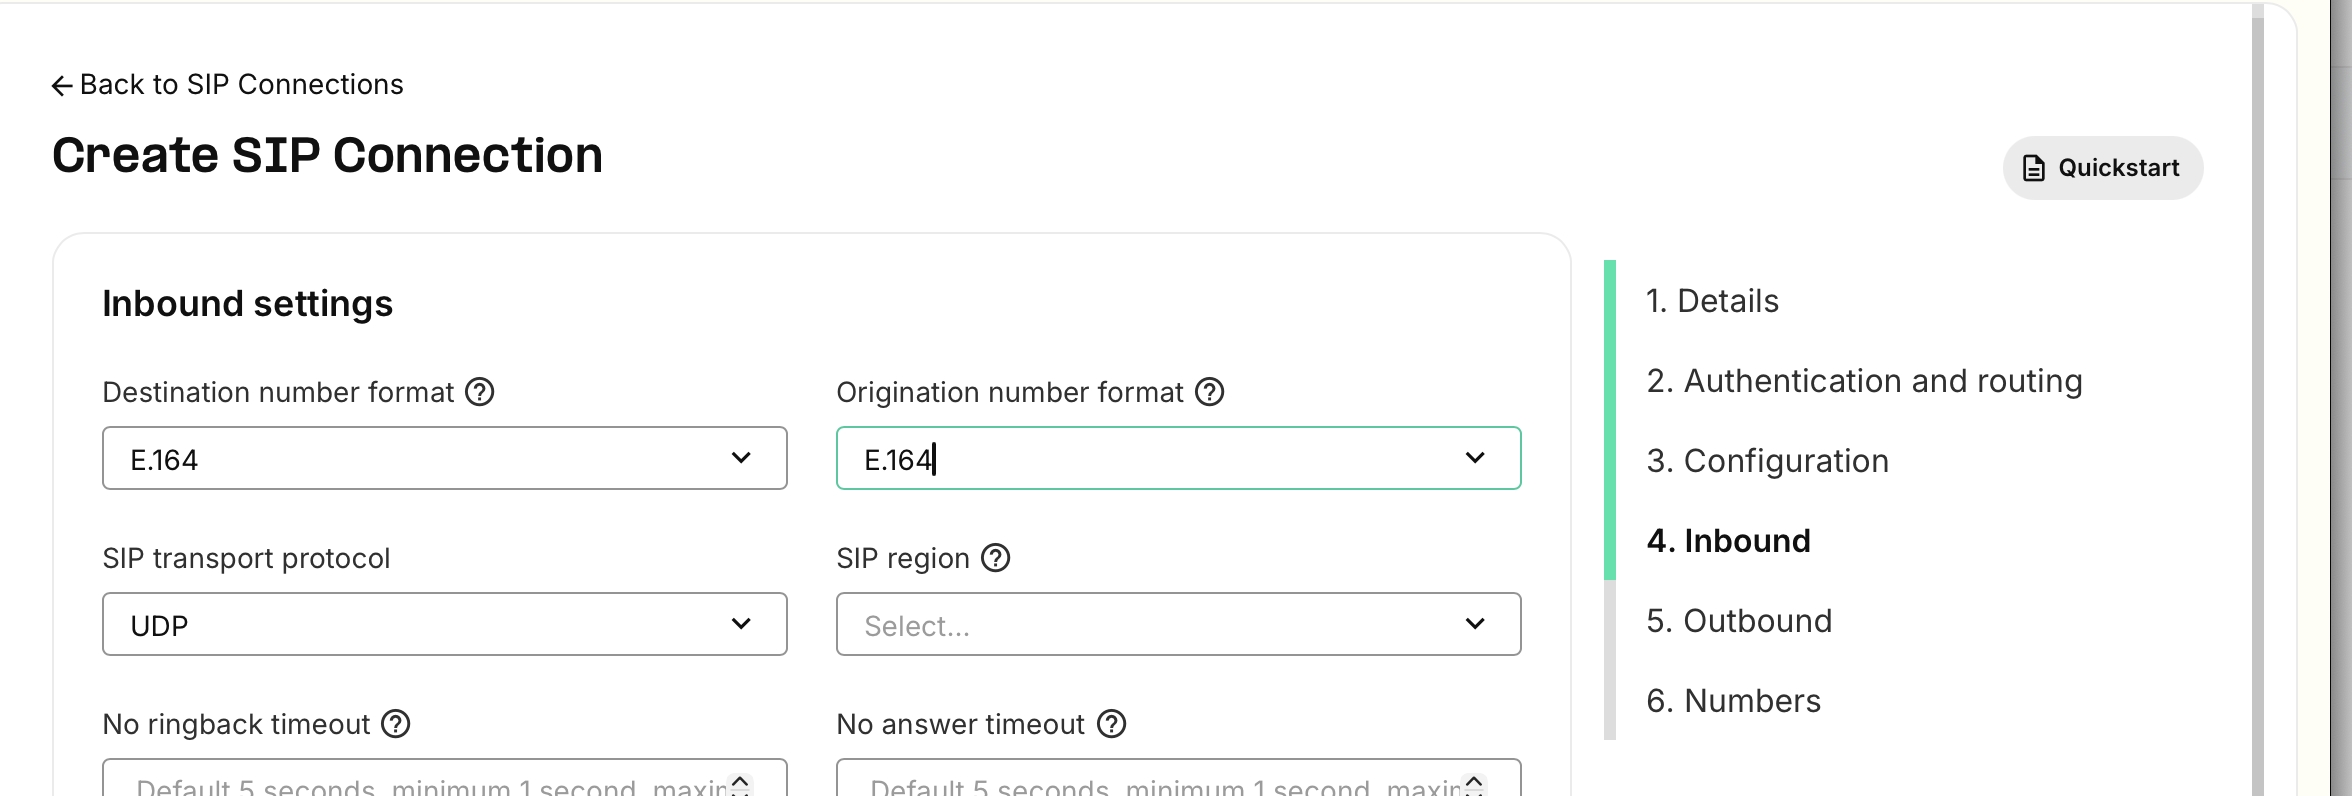
- On the “Inbound” step, select “E.164” as the Origination number format, do not use the default of “E.164 / National (e.g. US - 10 digits)”, this may cause issues with non-US calls.
- On the “Outbound” step, select “Default” as the outbound voice profile, and click Next.
- Select the numbers you wish to use for inbound calls in the “Assign Numbers” step, and click Complete.
- In Vogent, Go to the Call Settings tab in the left sidebar, and click Import via SIP, and enter sip.vogent.ai as the URI, and the username and password you created in step 5 as the credentials.
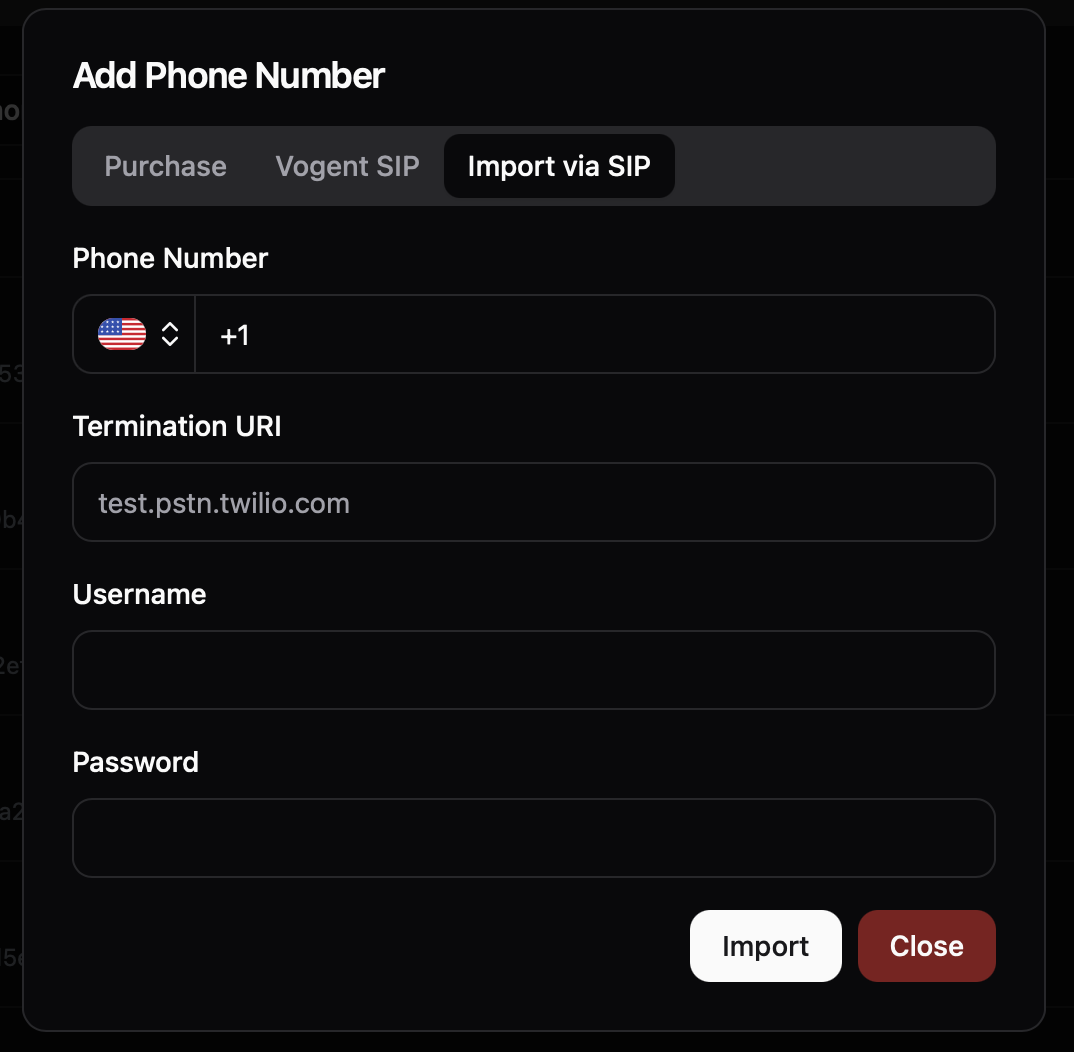
- Click Import to create the number, and you should be able to use the number to make outbound calls.
- To make inbound calls, you will need to add the numbers you selected in step 9 to the agent you want to use for inbound calls.