> ## Documentation Index
> Fetch the complete documentation index at: https://docs.vogent.ai/llms.txt
> Use this file to discover all available pages before exploring further.
# Telnyx SIP Import
> Import a Telnyx phone number into Vogent
Here are the steps to import a Telnyx phone number into Vogent.
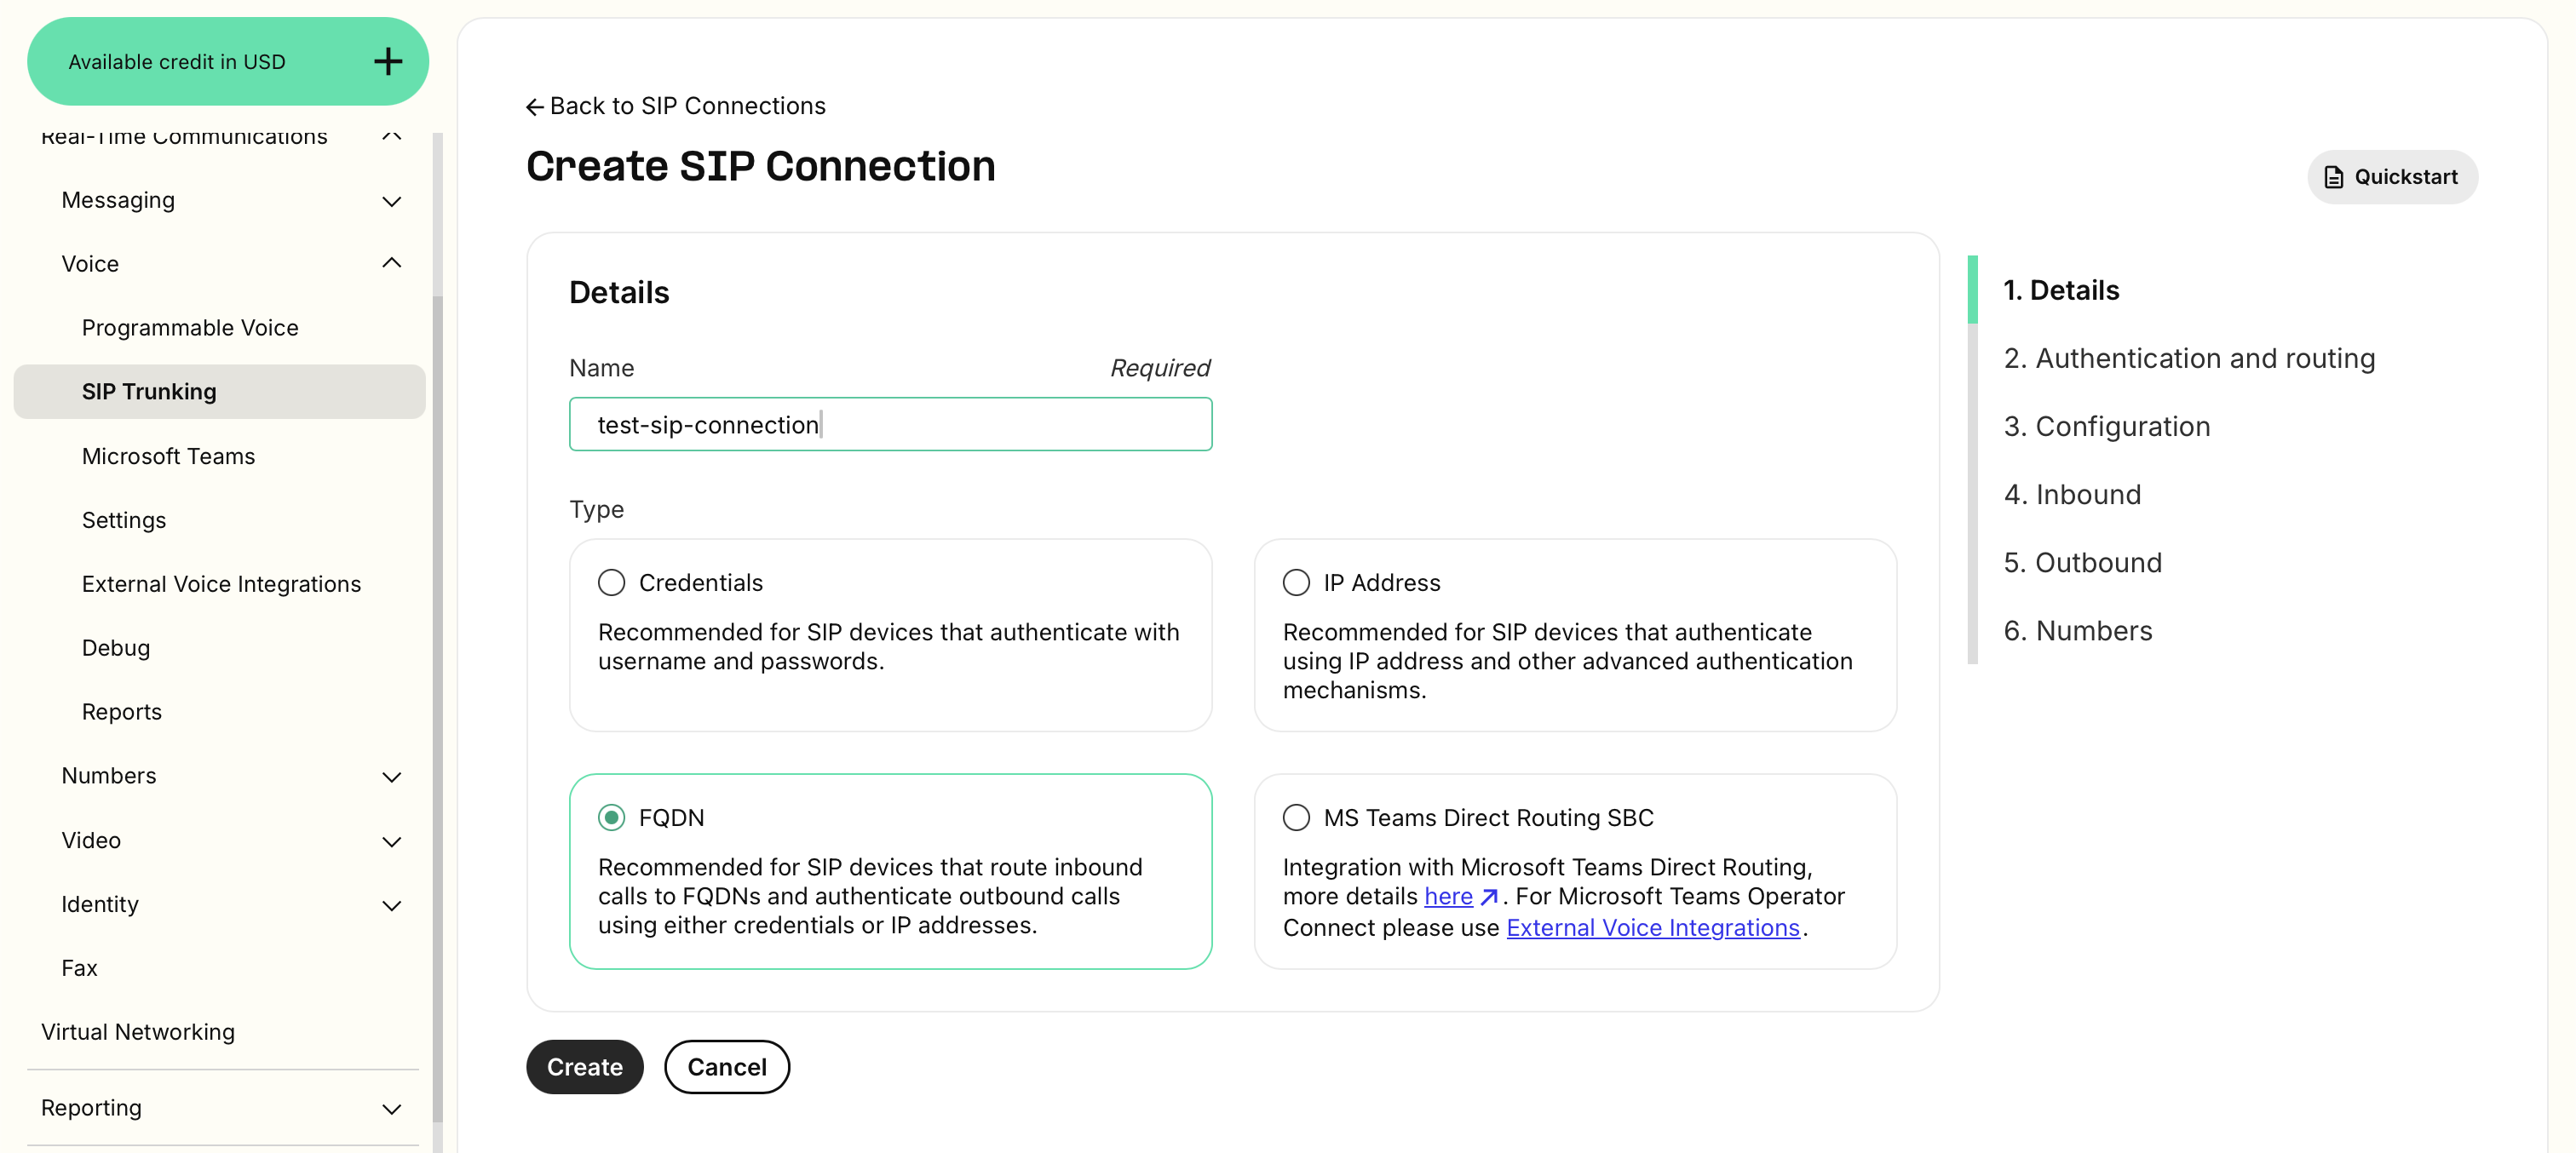
1. Go to the Telnyx Console and select SIP, under the Real-Time Communications > Voice section, and click **Create SIP Connection**.
 2. Select a name for your trunk, and select "FQDN" as the type, then click "Create".
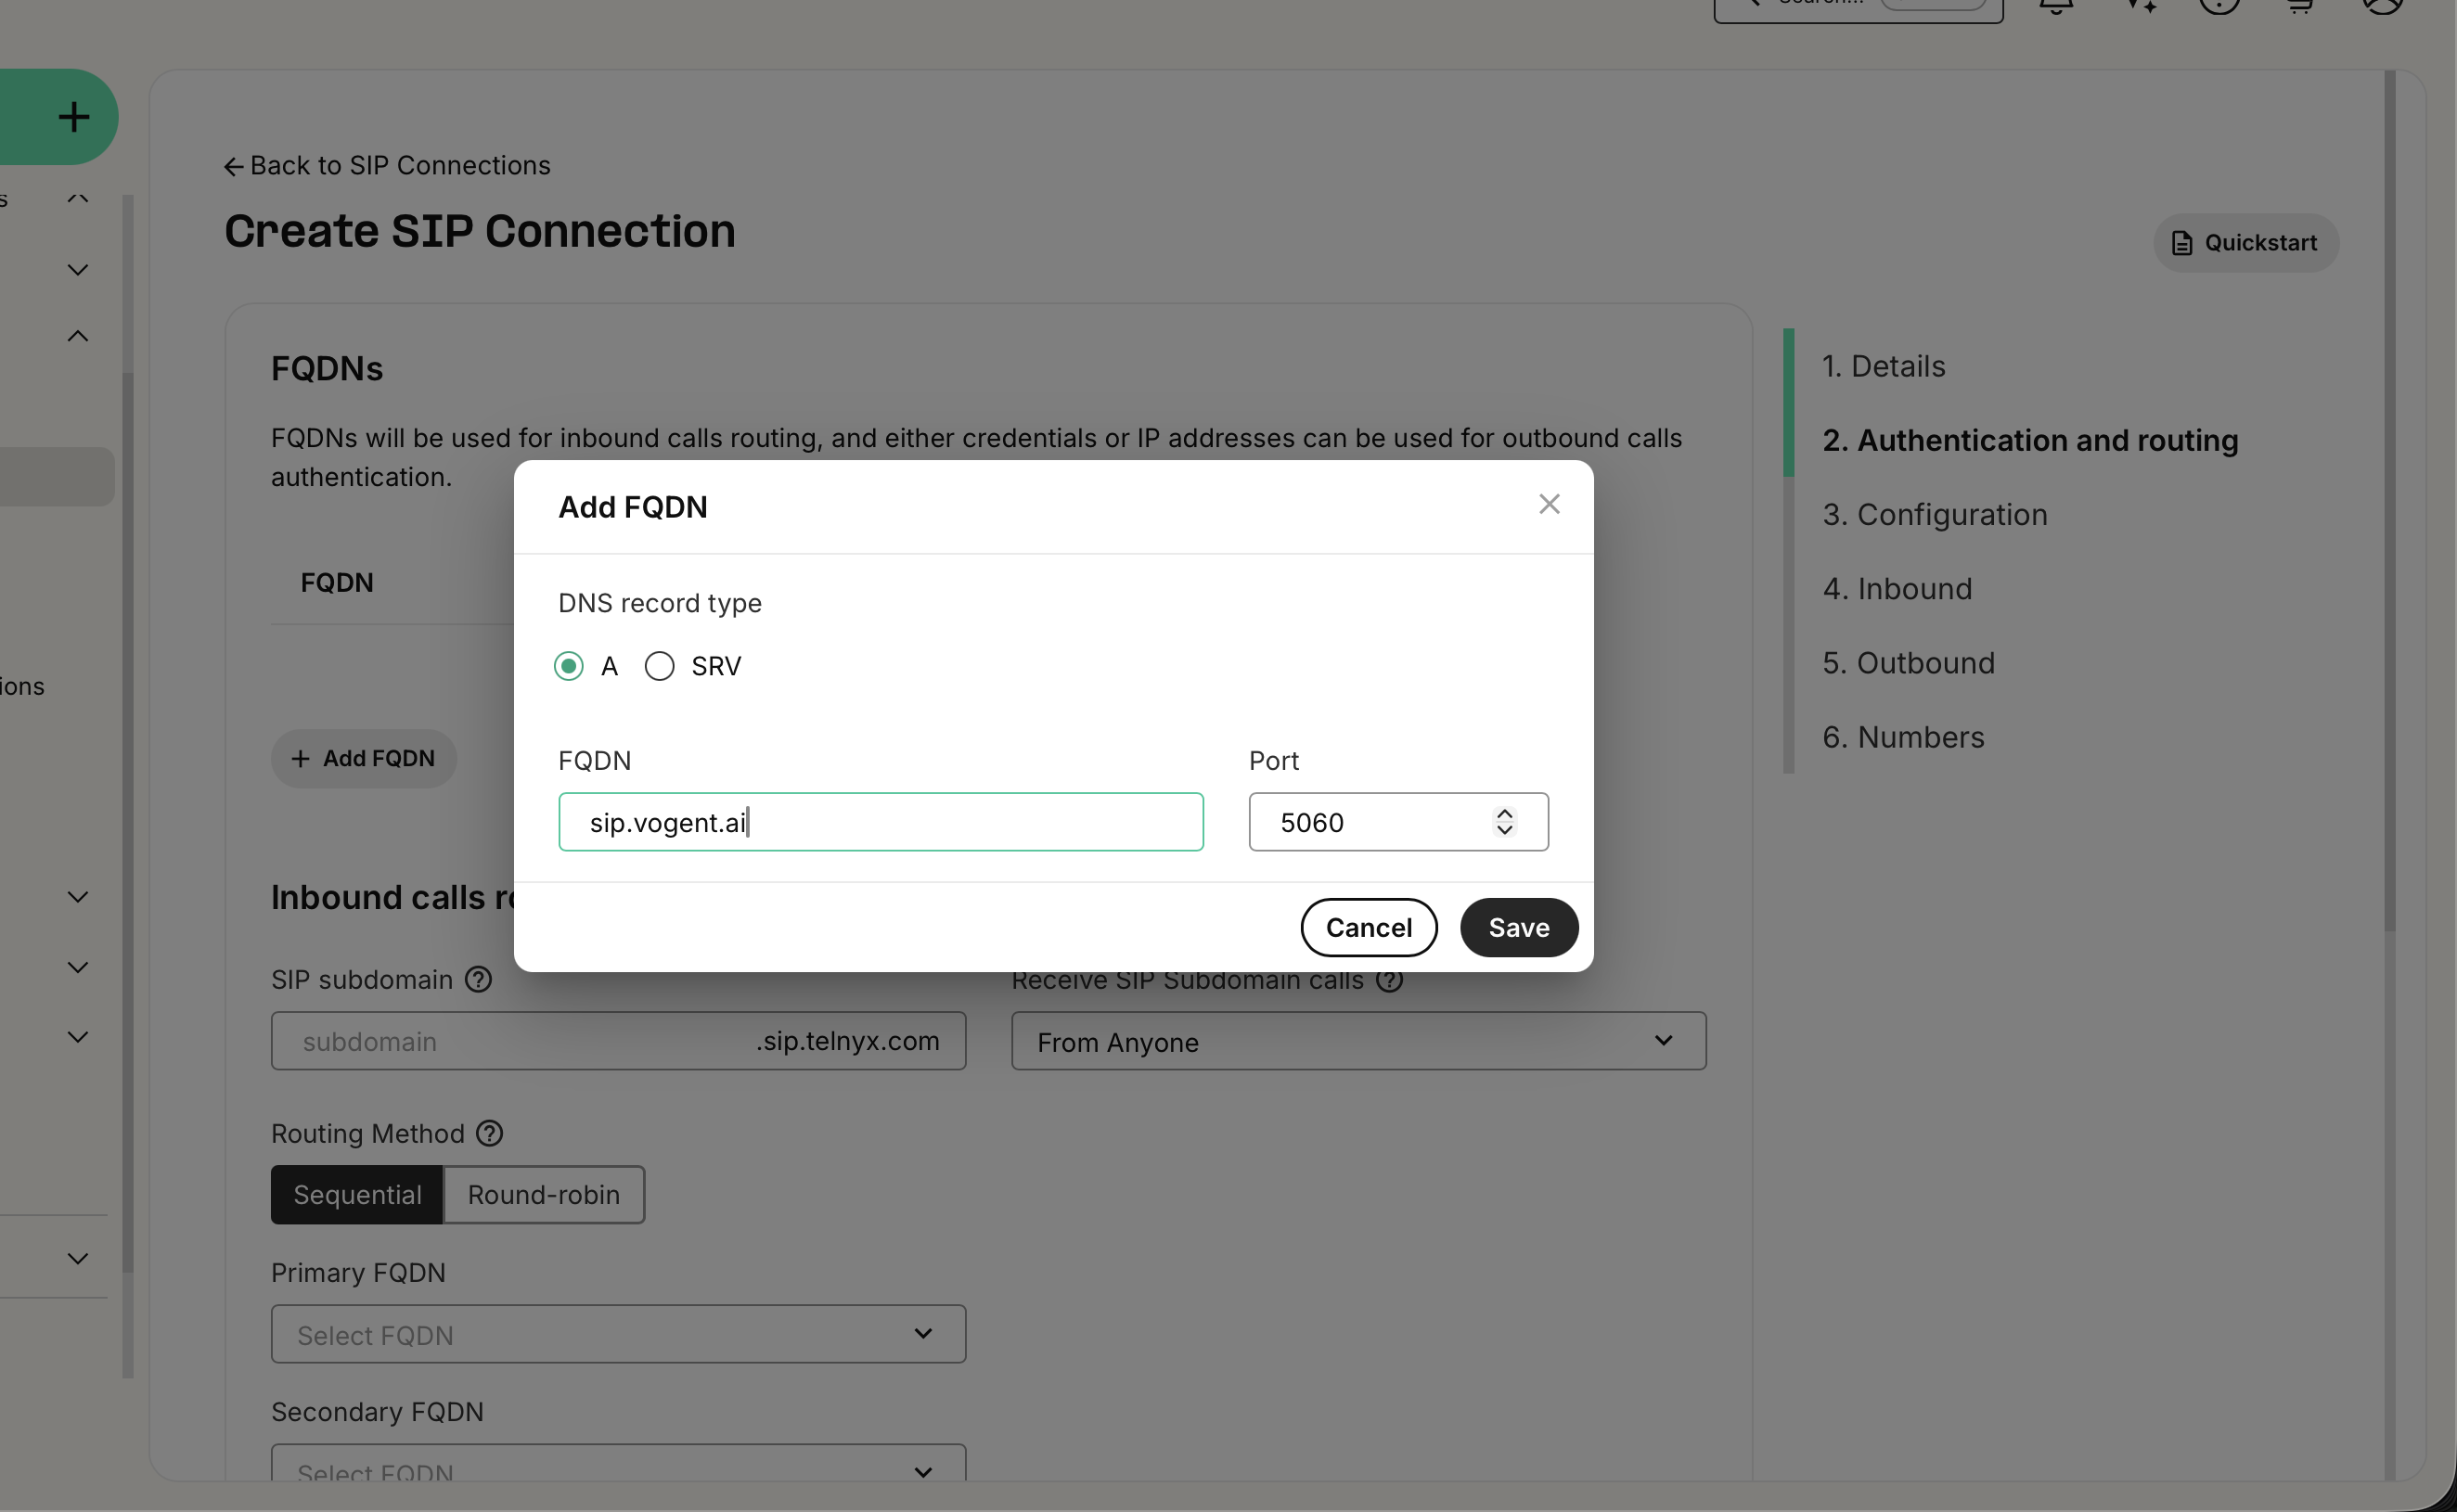
 3. Click "Add FQDN", and enter "sip.vogent.ai" as the FQDN to add.
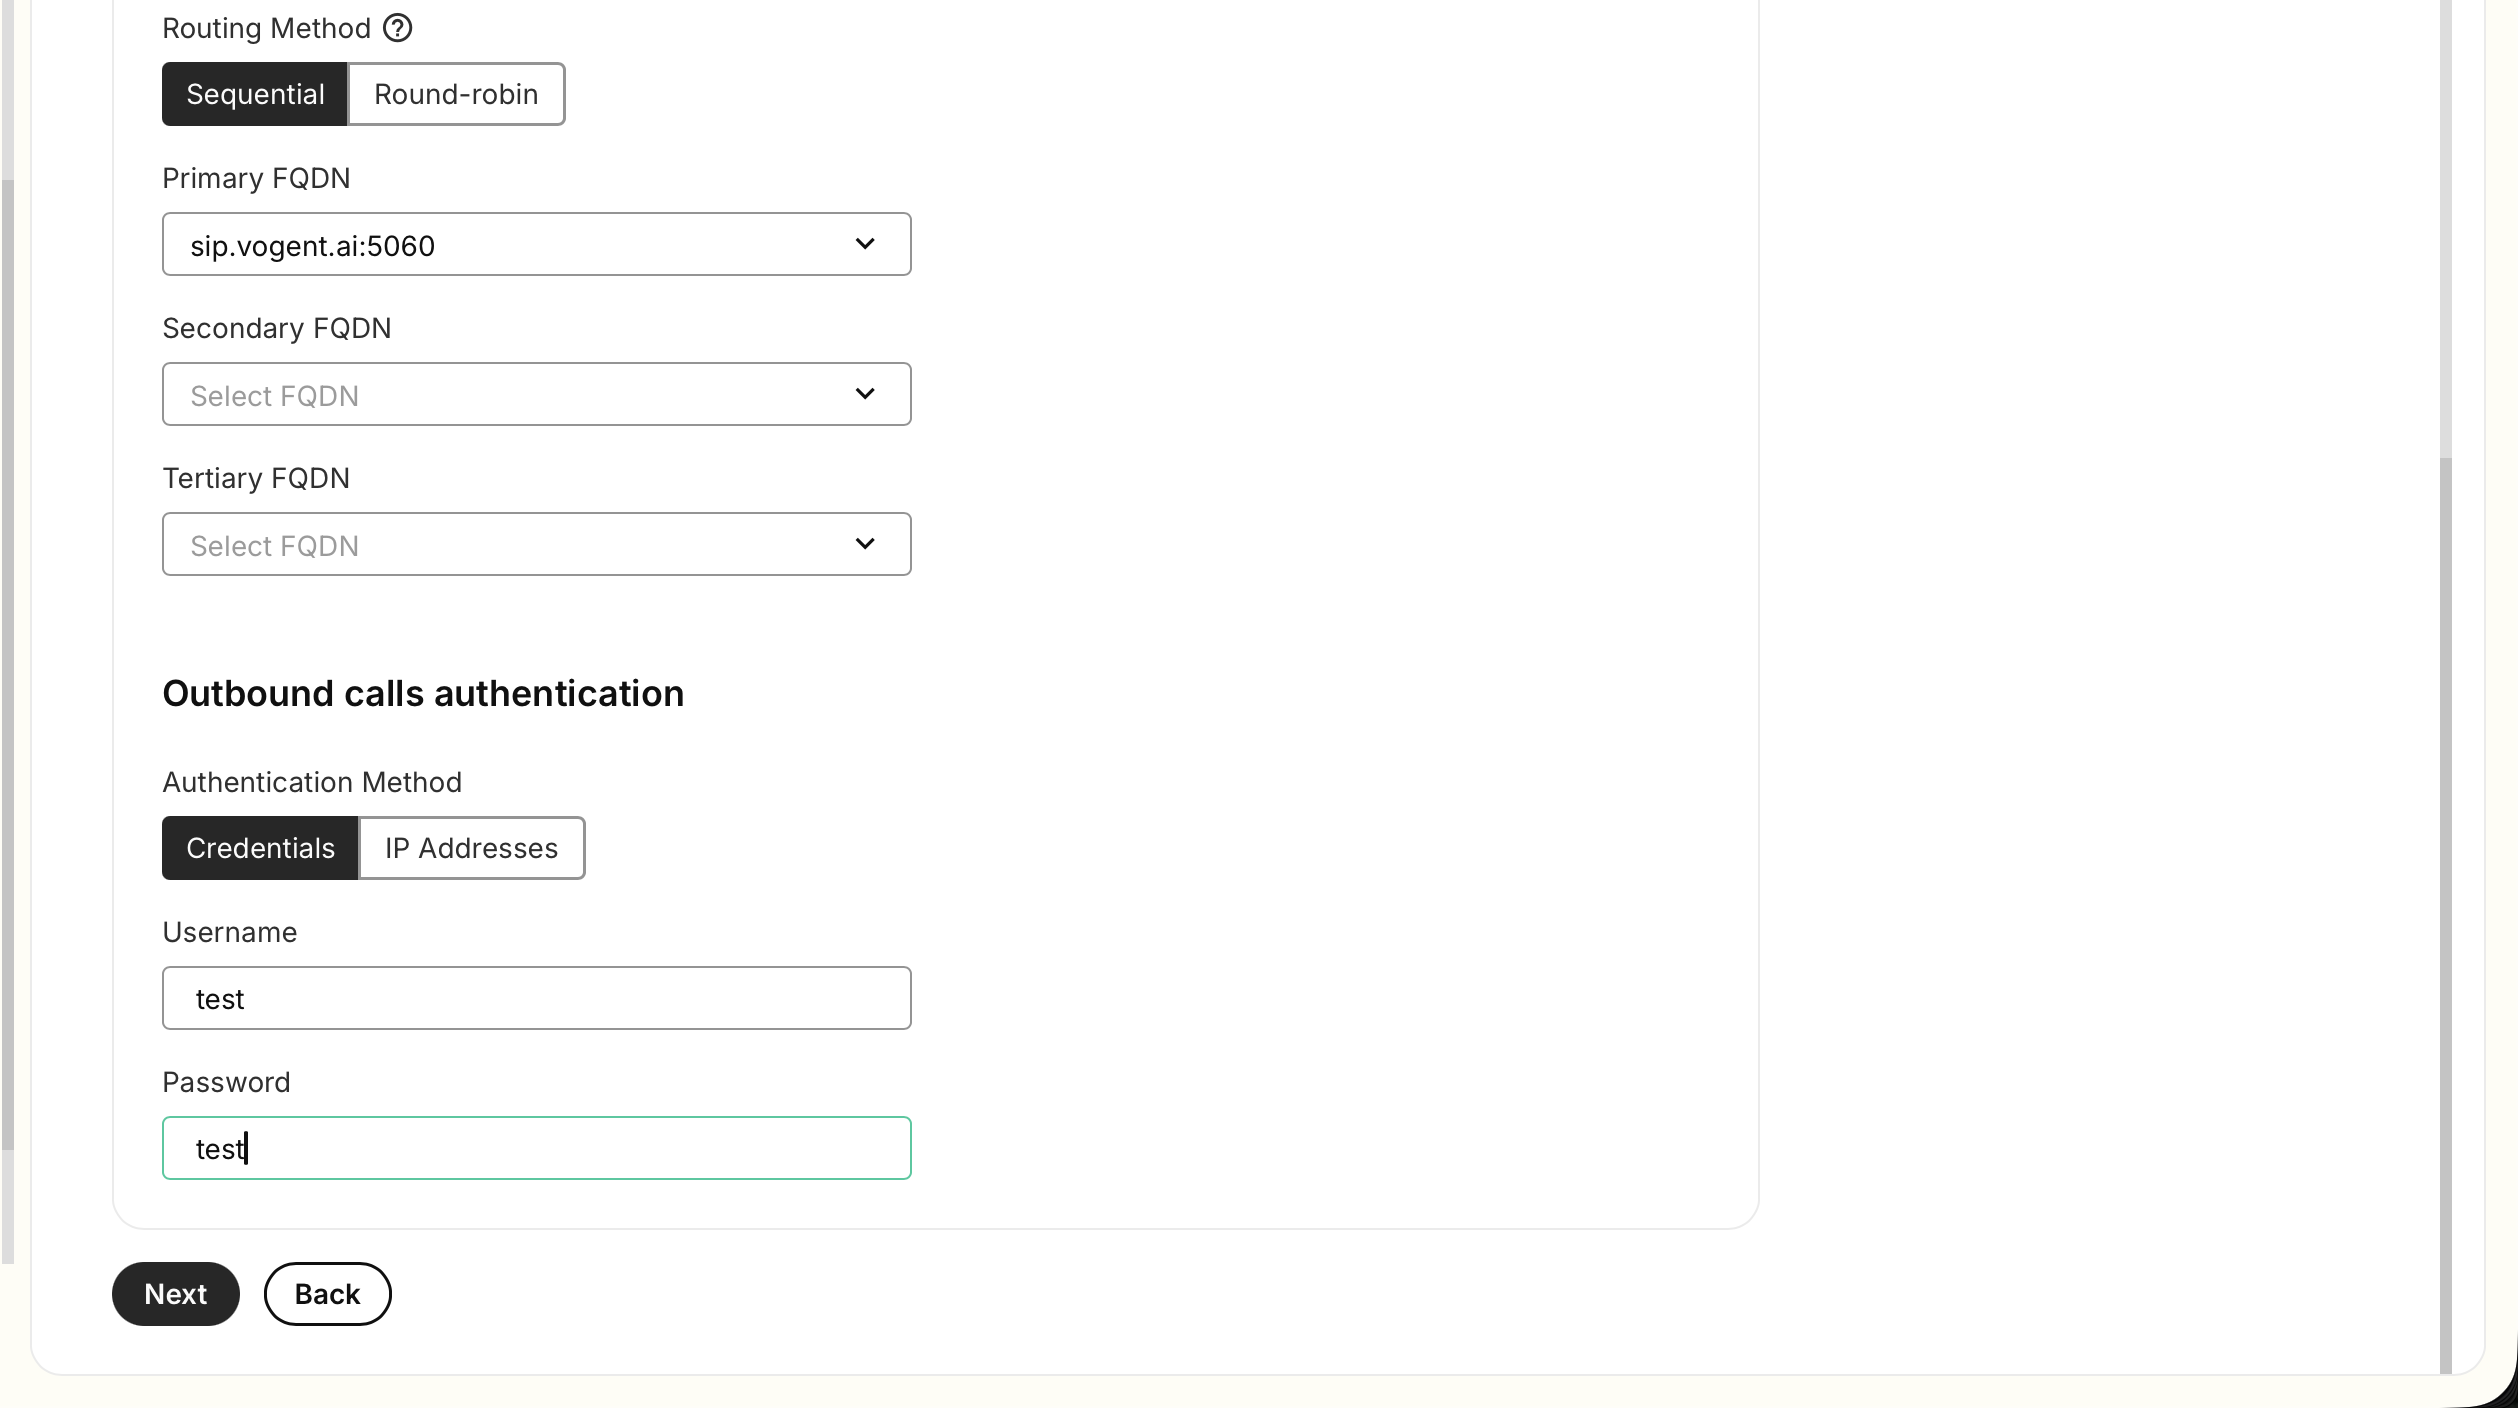
 4. Select the FQDN you just added (sip.vogent.ai) under "Primary FQDN".
5. Under the "Outbound calls authentication" section, select "Credentials" as the type, and create a username and password for the credentials.
4. Select the FQDN you just added (sip.vogent.ai) under "Primary FQDN".
5. Under the "Outbound calls authentication" section, select "Credentials" as the type, and create a username and password for the credentials.
 6. On the "Configuration" step, click Next, you may leave the defaults as-is for this step.
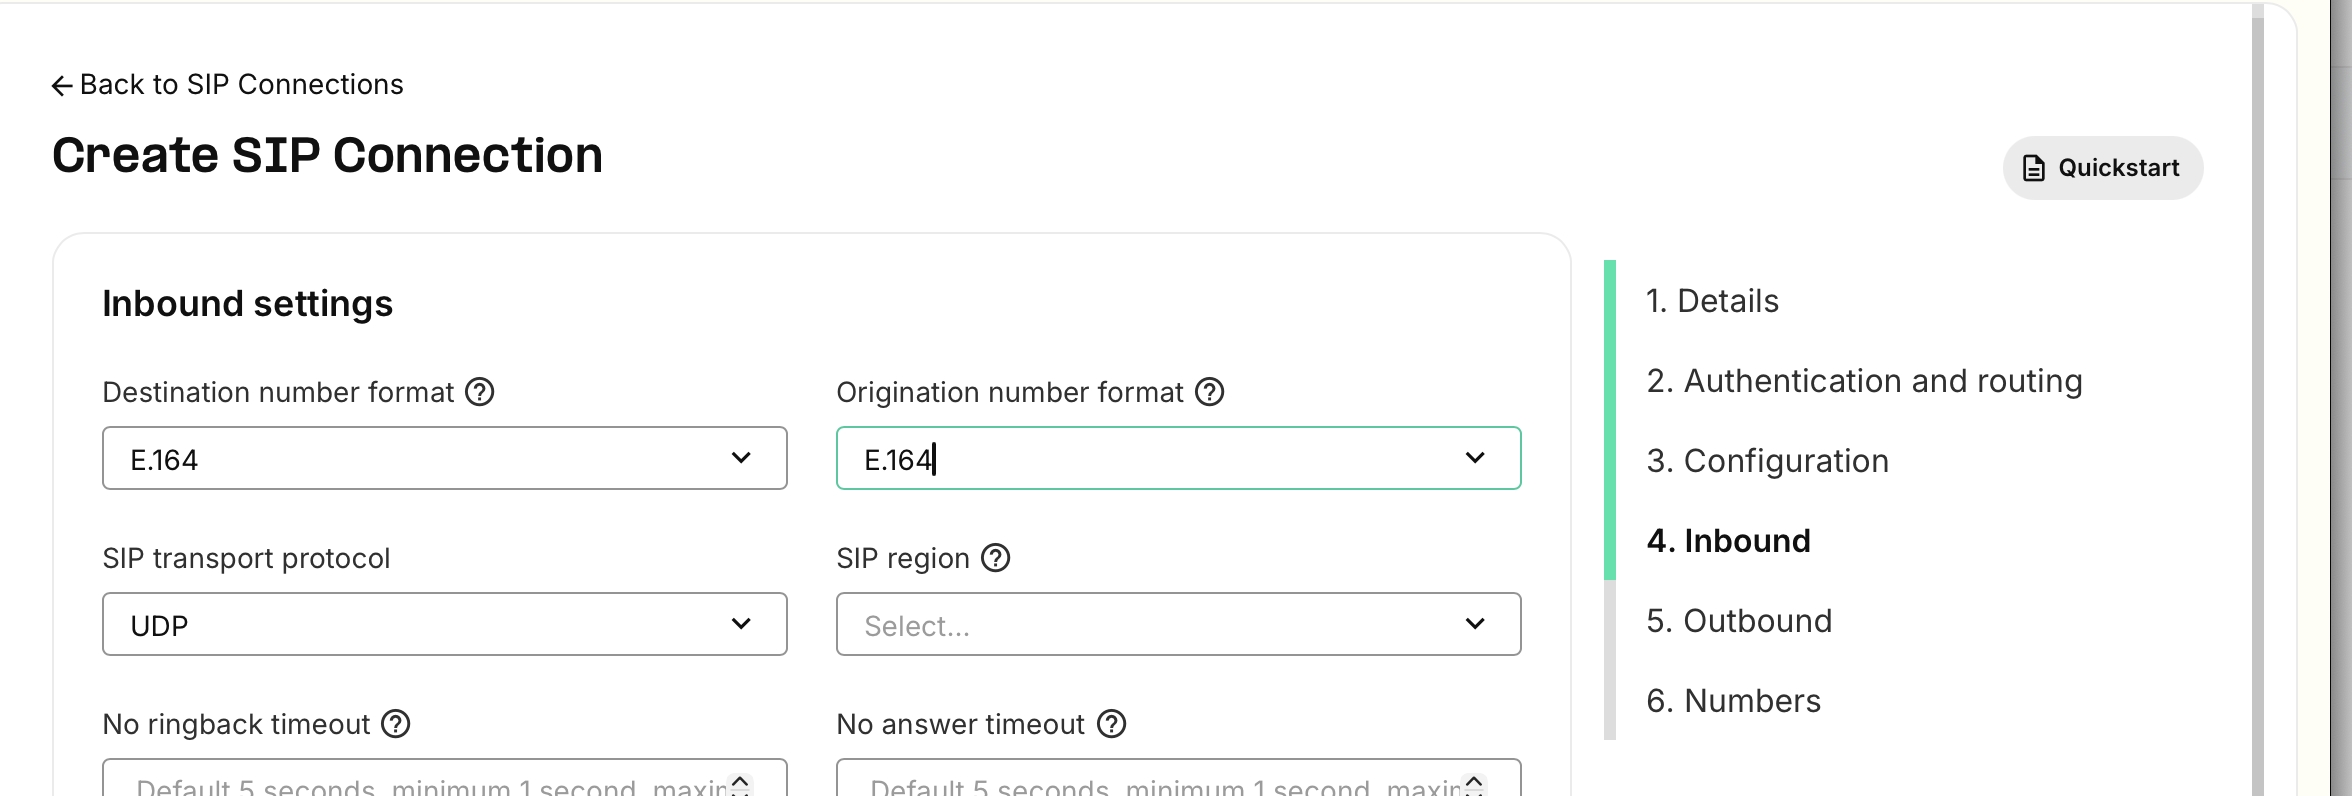
7. On the "Inbound" step, select "E.164" as the Origination number format, **do not use the default of "E.164 / National (e.g. US - 10 digits)"**, this may cause issues with non-US calls.
6. On the "Configuration" step, click Next, you may leave the defaults as-is for this step.
7. On the "Inbound" step, select "E.164" as the Origination number format, **do not use the default of "E.164 / National (e.g. US - 10 digits)"**, this may cause issues with non-US calls.
 8. On the "Outbound" step, select "Default" as the outbound voice profile, and click Next.
9. Select the numbers you wish to use for inbound calls in the "Assign Numbers" step, and click Complete.
10. In Vogent, Go to the **Call Settings** tab in the left sidebar, and click **Import via SIP**, and enter sip.vogent.ai as the URI, and the username and password you created in step 5 as the credentials.
8. On the "Outbound" step, select "Default" as the outbound voice profile, and click Next.
9. Select the numbers you wish to use for inbound calls in the "Assign Numbers" step, and click Complete.
10. In Vogent, Go to the **Call Settings** tab in the left sidebar, and click **Import via SIP**, and enter sip.vogent.ai as the URI, and the username and password you created in step 5 as the credentials.
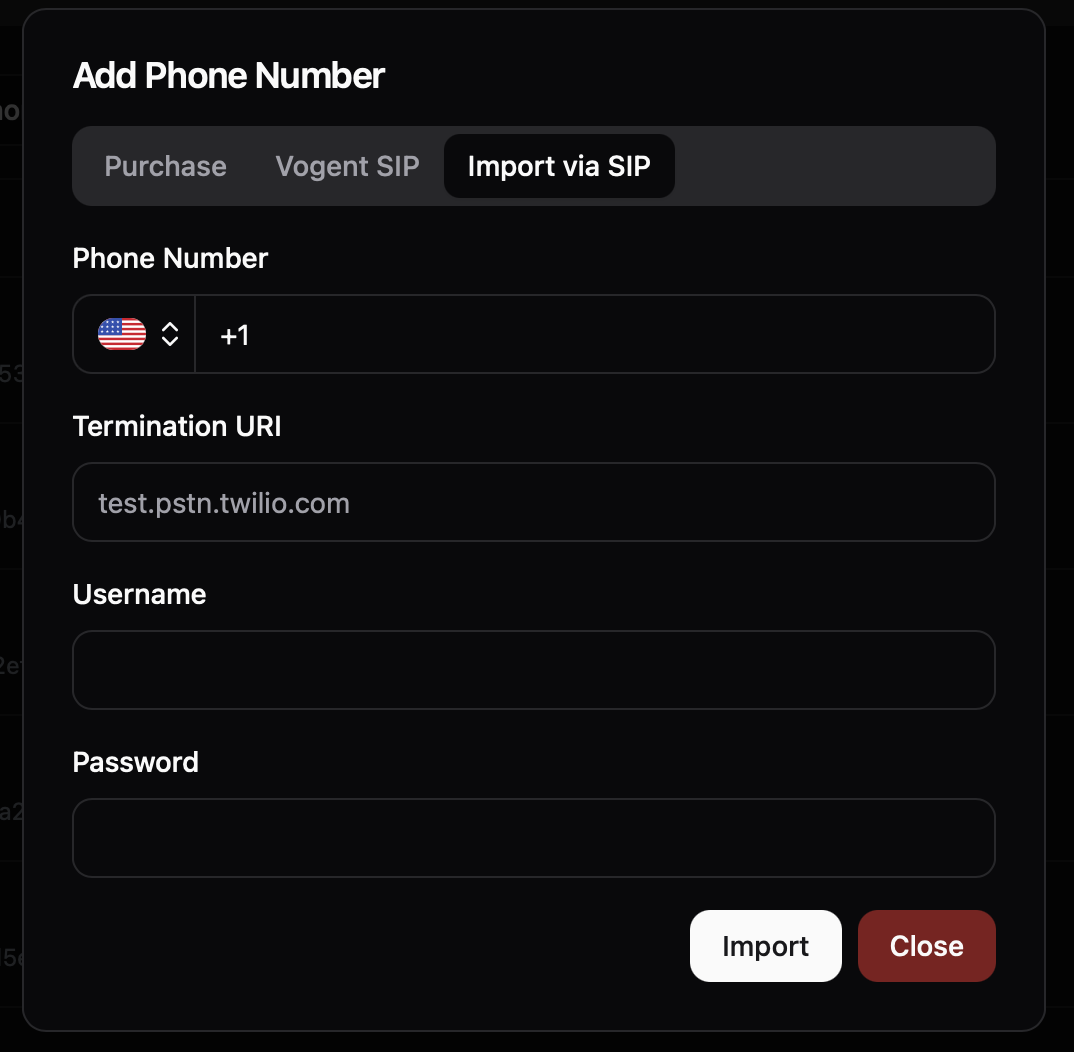 11. Click **Import** to create the number, and you should be able to use the number to make outbound calls.
12. To make inbound calls, you will need to add the numbers you selected in step 9 to the agent you want to use for inbound calls.
11. Click **Import** to create the number, and you should be able to use the number to make outbound calls.
12. To make inbound calls, you will need to add the numbers you selected in step 9 to the agent you want to use for inbound calls.